
Want to get more out of Excel? Try these
Ctrl+Shift to Select
Click in the first cell you want to select and hold down Ctrl+Shift, then hit either the down arrow to get all the data in the column below, up arrow to get all the data above, or left or right arrow to get everything in the row (to the left or right, of course).
If you combine the above directions, you can get a whole column then everything in the rows to the left or right. This will only select cells with data (even invisible data).
If you use Ctrl+Shift+End, the cursor will jump to the lowest right-hand cell with data, selecting everything in between. So if the cursor is in the upper left cell (A1), that’s everything. Even faster: Ctrl+Shift+* which will select the whole data set no matter what cell is selected.
Import Data into Excel Correctly
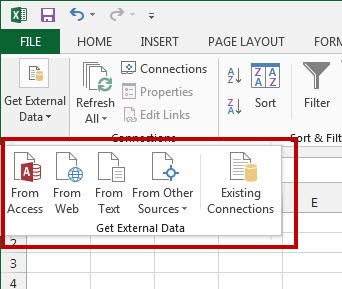
The benefit of using is Excel is that you can combine different types of data from all kinds of sources. The trick is importing that data properly. Don’t copy-paste complex data sets. Instead, use the options from the Get External Data option under the Data tab. There are specific options for different sources. So use the appropriate option for your data:
AutoFill
This is a pretty handy tip that can save you a lot of menial typing. If you are typing a series of repetitive things like dates (1/1/16, 2/1/16, 3/1/16, etc.) then you know it will take more time than you have. Instead, begin the series and move the cursor on the screen to the lower right part of the last cell – the fill handle. When it turns into a plus sign (+), click and drag down to select all the cells you need to fill. This will magically fill in the pattern you started, and you can also go up the column, or left or right on a row as well.
Flash Fill
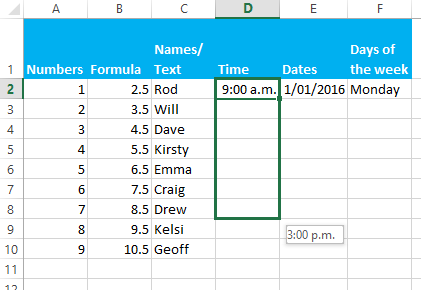
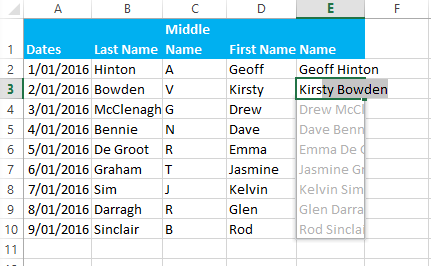
Flash Fill will smartly fill a column based on the pattern of data it sees in the first column (it helps if the top row is a unique header row). For example, if the first column is all phone numbers that are formatted like “032110099” and you want me to all look like “(03)-211-0099,” start typing. By the second cell, Excel should pick up the pattern and give you a display of what it thinks you want. Then all you have to do is hit enter.
This works with numbers, names, dates, etc. If the second cell doesn’t give you an accurate range, type some more—the pattern might be hard to recognize. Then go to the Data tab and click the Flash Fill BUTTON.
Text to Columns
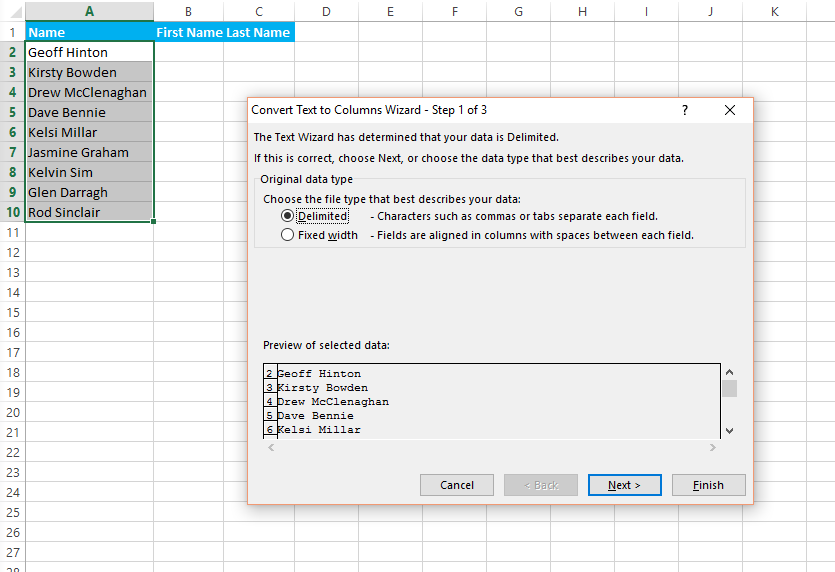
You can use Flash Fill to try this, but Text to Columns is super simple and doesn’t require much pattern recognition. If you have a column full of names, first next to last, but you want two columns that break them out. Select the data, then on the Data tab click Text to Columns, then choose to separate them either delimited or by a fixed width.
The rest is cake, with extra options for certain numbers. Fixed width is utilised when all the data is crammed into the first column, but separated by a fixed number of spaces or period.
Paste Special to Transpose
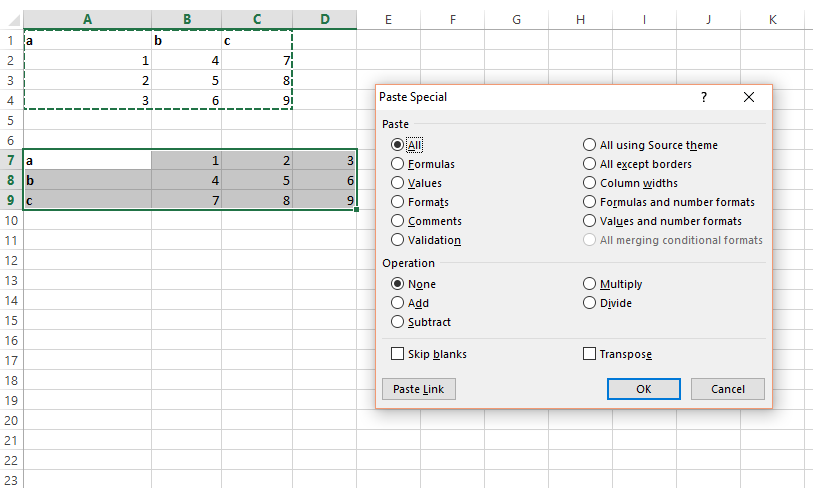
So you’ve inserted your data into rows and you have realised too late that they would serve better as columns, or vice versa. There’s no need to go crazy moving things cell-by-cell. Enter the solution – copy the data, select Paste Special, check the Transpose box, and paste with a different orientation. Ta-da!
Display Excel Spreadsheet Formulas

Jumping into a spreadsheet created by someone else? Don’t worry. You can easily orient yourself and find out which formulas were used. To do this, use the Show Formulas button. Or you can use CTRL + ` on your keyboard. This will give you a view of all formulas used in the workbook.
Multiple Cells, Same Data
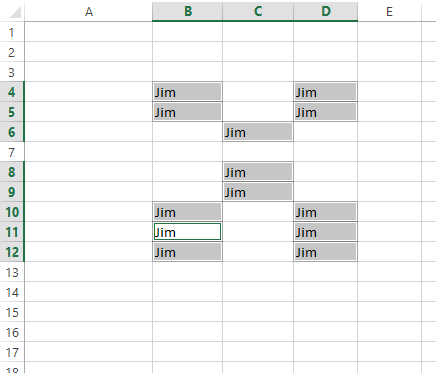
If, for some reason, you need to write the same thing over and over again in cells in a worksheet, just click the entire set of cells, either by dragging your cursor, or by holding the Ctrl key as you click each one. Type it on the last cell, then hit Ctrl+Enter — and what you typed goes into each of the selected cells.
Freeze Excel Rows and Columns
This is a personal favourite of mine when it comes to viewing lengthy spreadsheets. Once you scroll past the first 20 rows, the first row with the column labels annoyingly disappear from view and you begin to lose track of how the data was organized.
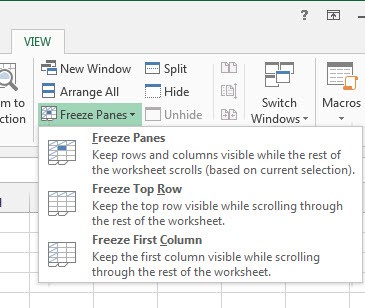
To keep them visible, use the Freeze Panes feature under the View menu. You can opt to freeze the top row or, if you have a spreadsheet with numerous columns, you can opt to freeze the first column
Use Graphics in Charts
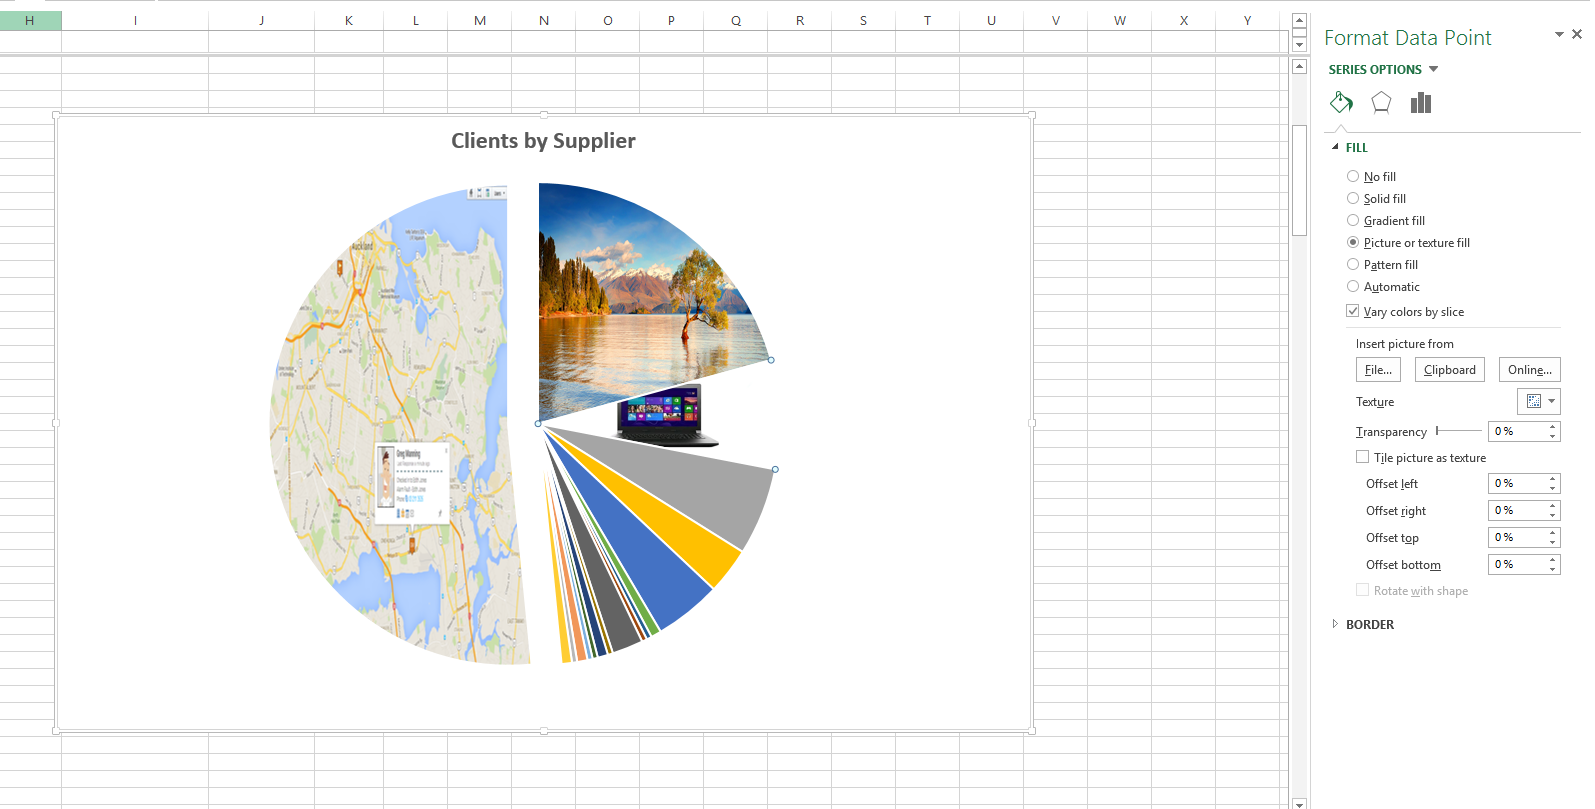
Did you know that you can put a graphic in any element of an Excel chart?
You can put a graphic in any element of an Excel chart. Any element. Each bar, piece of pie, etc., can support its own image. For example, above, there’s a South Dakota state flag on the pie chart (placed by selecting the slice, using the Series Options fly-out menu, and selecting “Picture or texture fill”), plus an embedded PCMag logo (placed with the Insert tab’s Pictures button). You can even go with “no fill” at all, which caused that missing slice. Clip art can also be cut and pasted to an element—dollar bills to show dollars spent, water drips for plumbing costs, that kind of thing. We’ll be honest, mixing and matching too many graphical elements makes it impossible to read, but the options you have are well worth tinkering with. Just let the resident graphic designer check them out before you use them.
Save Charts as Templates
Excel has more types of charts than you can point a stick at, but it’s nigh on impossible to find a default chart that is perfect for your presentation. Luckily, Excel’s ability to customise all those graphs is amazing! But when you have to go back and recreate one? That’s simply annoying. And a waste of time. This can all be solved by saving your original chart as a template.
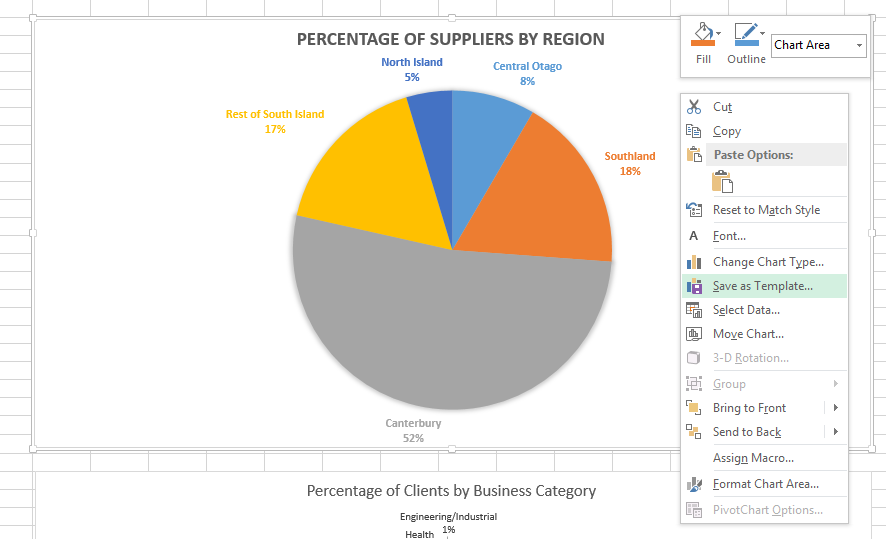
Once you have your chart looking exactly the way you want it to, right click, and select Save as Template. You’ll save this file as a CRTX extension in your default Microsoft Excel Templates folder, and once this is done, applying the template is just too easy.
Select the data you want to chart, go to the Insert tab > Recommended Charts > All Charts > Templates folder.
Once you are in the My Templates box, simply pick the template you would like to apply, and then click OK. Some of the elements, like the actual text in the legends and titles, might not translate unless they’re part of the data selected. You will get all the font and colour selections, embedded graphics, even the series options (like a drop shadow or glow around a chart element).
Copy Formulas Or Data Between Worksheets
Another helpful tip to know is how to copy formulas and data to a separate worksheet. This is handy when you’re dealing with data that’s spread across different worksheets and requires repetitive calculations.
- With the worksheet containing the formula or data you wish to copy opened, CTRL + click on the tab of the worksheet you want to copy it to.
- Click on or navigate to the cell with the formula or data you need (in the opened worksheet).
- Press F2 to activate the cell.
- Press Enter. This will re-enter the formula or data, and it will also enter it into the same corresponding cell in the other selected worksheet as well.
Great Excel Shortcut Keys
- Ctrl+; — Inserts today’s date.
- Ctrl+Shift+: — Inserts the current time (the colon is what is in a clock reading, like 12:00).
- Ctrl+Shift+# — Changes the format of a date.
- Ctrl+5 — Applies a strikethrough to the text in a cell.
- Ctrl+0 — Hides the current column.
- Ctrl+9 — Hides the current row.
- Ctrl+F6 — Switches between open workbooks (that is, open Excel files in different windows).
- Ctrl+` — That’s the accent mark, up by the 1 key. This combo toggles the view in the sheet to show all the formulas. Ctrl+PageUp or PageDown—Quick shift between the sheets in the currently open workbook.
- F2 — Start editing the current selected cell (much faster than double-clicking).
- Shift+F10 — Opens the right-click menu for the cell you’re in.


