How to use the 3CX Softphone - A Cheat Sheet
3CX is the phone system that we use here at Focus. It is an IP telephony solution that is flexible and scalable, and it was very useful to have over lockdown due to the ability to use it both on your computer and on an app on your mobile phone. This article was created by our 3CX team at Focus to run through the basic functionalities of the 3CX software.
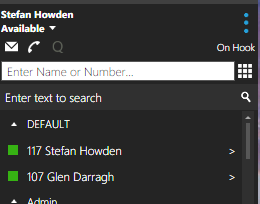
Below you can see the home screen of the 3CX software.
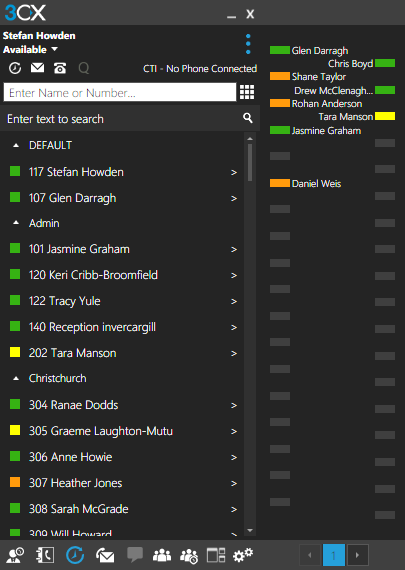
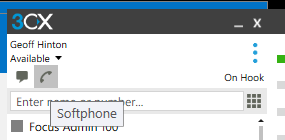
This software is configured to run with a phone or headset attached (or both). You can tell if it is connected to a deskphone (CTI) or headseat (Softphone) by hovering over the Call Handling Mode (CHM) symbols, as per the examples below.
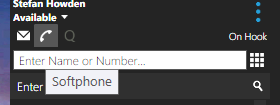
Using the softphone mode, you can use your PC as a phone. This allows calls to be made on your PC using the local sound and microphone – very handy if you are wanting your staff to use headsets or for those who work from home.
At the bottom of the home screen, you can access different features of the 3CX desktop client. From left to right they are: Presence Information, Contacts, Call History, Voicemail, Chat, Web Meeting, Conference, Switchboard, and Settings.

Making calls using your 3CX Software
To make a call using your 3CX software, simply type the number in the “Enter Name or Number” field at the top of the screen. In the example below, we have entered the Focus Queenstown branch number of 034410099. If you press the green call button, your phone will dial the number and you can then pick up your hand/headset.
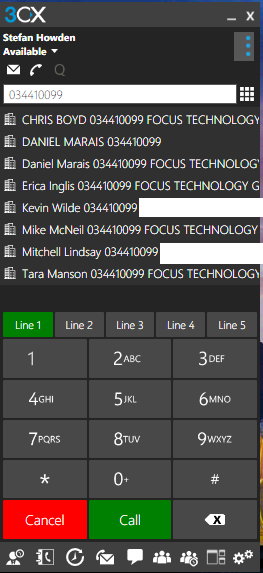
To complete your call, either hang up the hand/headset or click on the red “End” button.
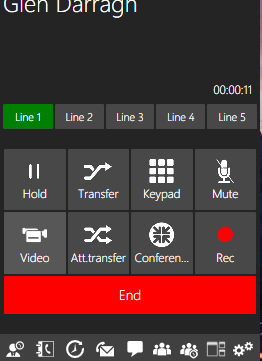
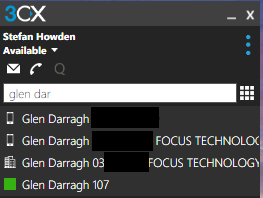
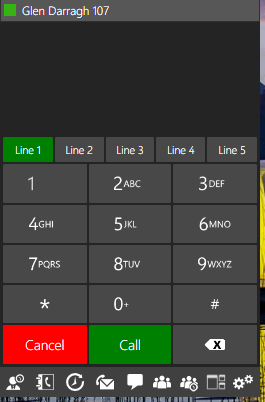
You can also make calls to local and remote 3CX extensions (i.e. within or between branches). Either select the staff member you wish to contact from the Presence Tab or type their name in the search field. To make the call, either double click on the contact or click and press the green “Call” button.
Transferring Calls with 3CX
There are two options for transferring calls – a blind transfer or an attended transfer.
- Blind Transfer – you simply move the call from your extension to another extension or mobile number.
- Attended Transfer – this allows you to speak to the person at the destination extension first.
To complete a blind transfer:
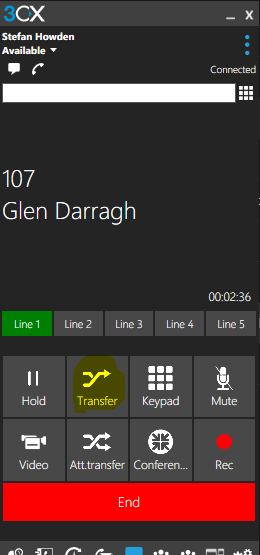
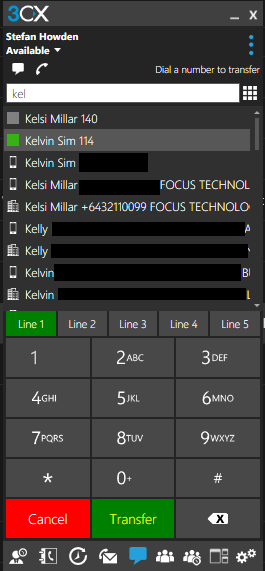
On an active call, click the “Transfer” button, select the contact to transfer the call to and then hit “Transfer”
To complete an Attended Transfer:
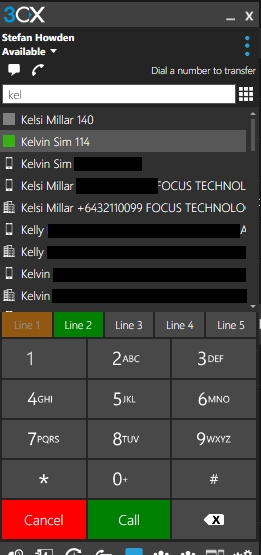
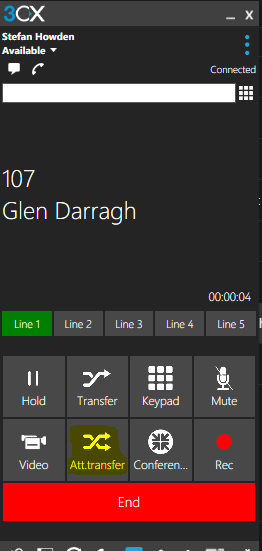
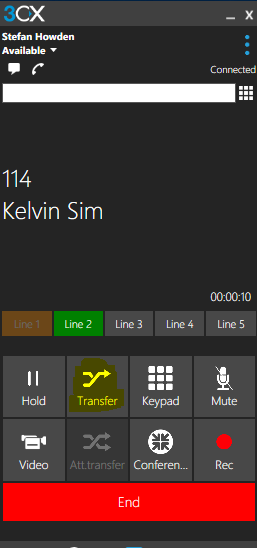
On an active call, click “Attn.transfer”, select the contact to speak with first and click “Call”, then once you have finished you can hit the “Transfer” button.
Recording Voicemail Greetings with 3CX
Using the tabs at the bottom of the 3CX home screen, click on the envelope icon for Voicemail.
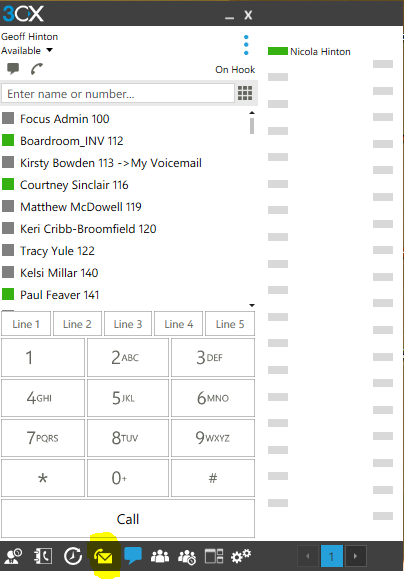
Once inside of the voicemail folder, click on the folder with the musical note (see below).

The next screen allows you to select which greeting you wish to record. You can hover over the coloured boxes to see the description for each greeting.
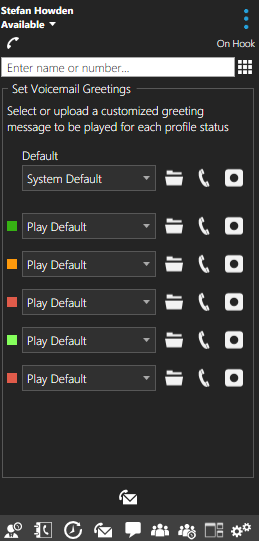
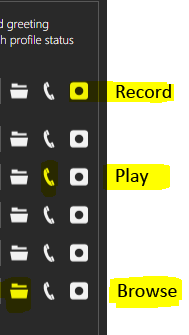
- The “Record” button will let you record a new greeting.
- The “Play” button will let you review recorded greetings.
- The “Browse” button will let you find an already recorded greeting.
How to record a greeting with 3CX
To record a voicemail greeting, click on the record button and enter a file name for the greeting. Make it relevant to the greeting you are recording. The system will then call you.
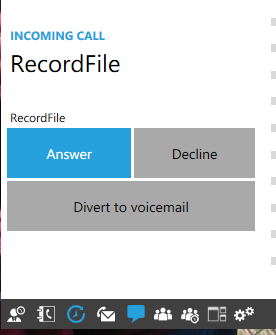

Your phone will ring and you need to hit answer. From here, you will be prompted to record your greeting message. After finishing the recording, you will need to hit the # key to complete the recording. If using the softphone option, in order to view the # key, you will need to hit the keypad button at the top of your 3CX software window.

Changing your Call Handling Mode in 3CX
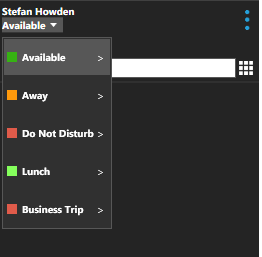
After your message greetings have been recorded, you can select the correct Call Handling Mode (CHM) for your needs. Under your name where it says “Available”, you can click to bring up a dropdown list and select the appropriate Mode for you.
Having hearing problems with your 3CX?
If you are finding that you are having hearing issues on your headset, such as if your headset is not ringing, hover over the Telephone icon on your software. It should say “Softphone”. If it doesn’t then you will need to click it until it selects Softphone. This button can be accidentally hit sometimes, so just make sure you are in “Softphone” mode.
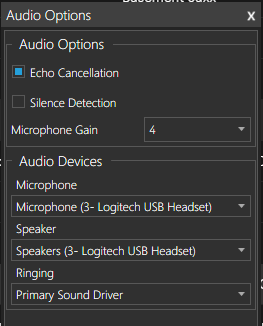
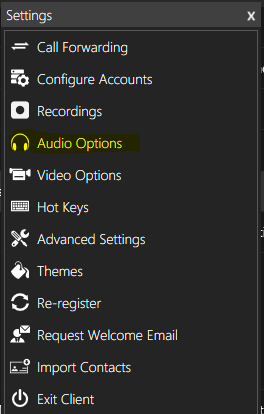
If that has not fixed your hearing issue, ensure that your audio options are setup correctly in the “Settings” tab. First step is to select the “Settings” tab, then “Audio Options”, and then make sure your Microphone and Speaker are correctly set.
How to create a Conference Call in 3CX
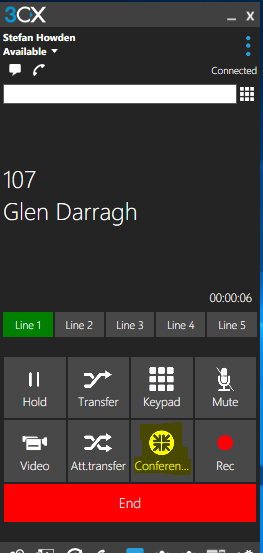
To create a conference call, simply call one of the contacts you wish to participate, then click on the “Conference” icon.
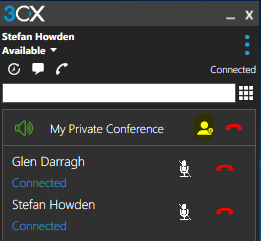
Beside “My Private Conference”, click on the person icon.
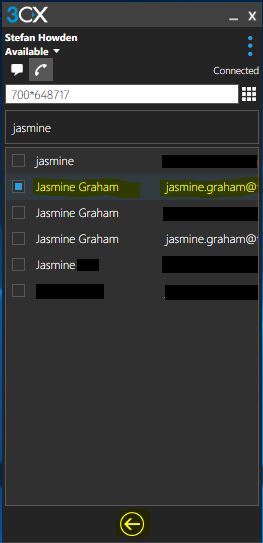
Type a contact name or number, tick the box and click on the back arrow.
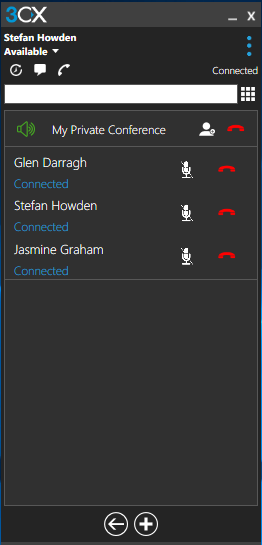
The contact has now been added to the conference call.
Another way to create a conference call is prior to starting a call. Click on the Conference icon at the bottom of the home screen, and then “Create Conference”.
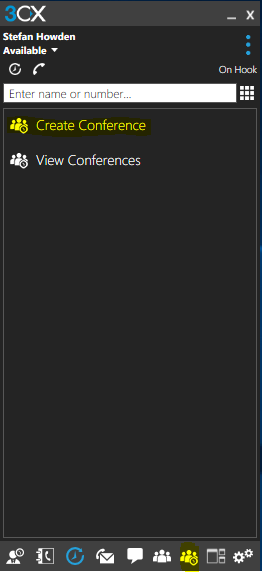
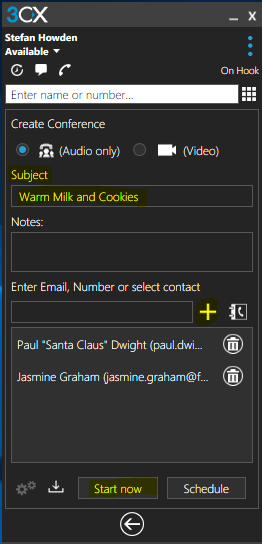
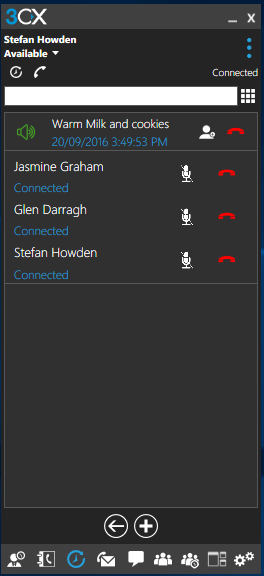
Enter the relevant details for the conference call such as the Subject and enter the contact details via the + symbol. Once you have selected all contacts to join conference, click “Start now”.
Looking for more information on 3CX?
Give our team a call to discuss your telephony needs.


