Do you regularly conduct a stocktake? Did you know you MYOB EXO Business has an easy to use Stocktake feature?
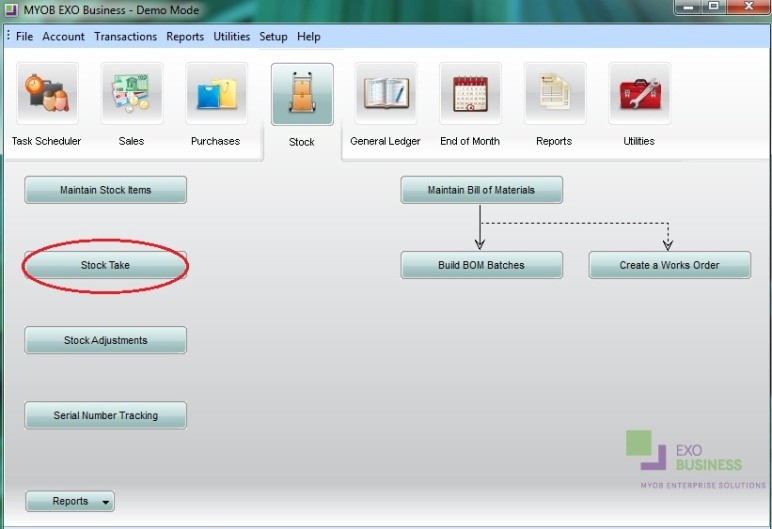
To find the MYOB EXO Stocktake feature, choose the ‘Stock‘ Menu button and then select ‘Stocktake’.

(If using the Drop-down menus, select Utilities menu > Stock Utilities > Stocktake.)
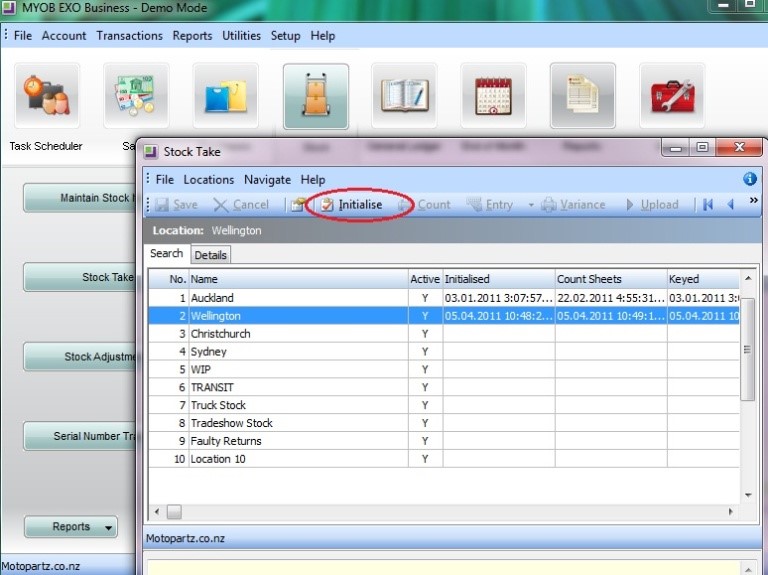
1. Within the Stocktake page, select the location that you are counting stock for in the locations grid.
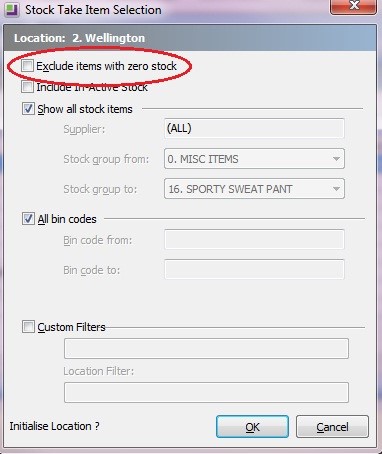
2. This stage is really important, click the Initialise button and set selection criteria if required. This initialises the stock location, creating a snapshot of the present stock levels and sets the corresponding counted quantities to zero ready for keying.

Important points to note when initializing stocktake
- When you initialize, make sure you remove the tick from the negative stock option. Otherwise, you won’t be able to enter stock levels for any stock that the system had zero or negative stock levels for.

- Timing of when you initialize the stocktake is crucial.
o It doesn’t matter which period your system is in (i.e. you can roll into the new month if you want).
o Initialize the stocktake before costing in any stock that will not be included in the stocktake. For example if you’re counting 31 March stock end-of-day stock levels on April 1:
Enter all transactions that affect stock levels up to end of day on 31 March, so that your stock system is completely up-to-date.
Don’t enter any “April” transactions that affect stock levels (until after you have initialized the stocktake).
Initialize the stocktake for each location that you’re counting.
After you’ve initialized, you can then start entering April transactions, even if you haven’t entered the counted quantities.
3. Print count sheets for each location and perform a physical count.
Important points to note when counting your stock
- Count the quantity of stock on hand as at the time you initialised the stocktake. For this reason, it’s much easier to count while you’re not selling. Best practices include:
Perform the count outside business hours; or
Initialise the Stocktake for a single aisle/shelf/bin location at a time, and block off access to that area while the count is done. (For more help on this see our tip on Stocktake by Bin Location )
4. Key in the counted quantities or import a CSV format file containing the count.
Important points to note when keying the counted quantities
- If a stock item appears on the “Enter Count” screen and you don’t enter a count for that item, the stock level will be adjusted down to zero when you upload the stocktake.
5. Print variance reports. Check any “suspicious” count figures and amend keyed quantities if required. If amending counted figures be sure to reprint the variance report again.
Important points to note when printing the variance report
- The total variance at the end of the report is the total value of stock that will be written off if you proceed to the final step. Do not proceed to the Upload step until you are happy with this figure.
6. When happy with the counted figures, run the stock take upload function. This creates stock transactions for any items that have a variance. This is the first point in the workflow that any amendment to the “true” stock ledger occurs. Up to this point the stock take may be discarded and recounted by rerunning the initialisation at step 2.
For more help on using the Stocktake feature, press F1 from the Stocktake screen.


