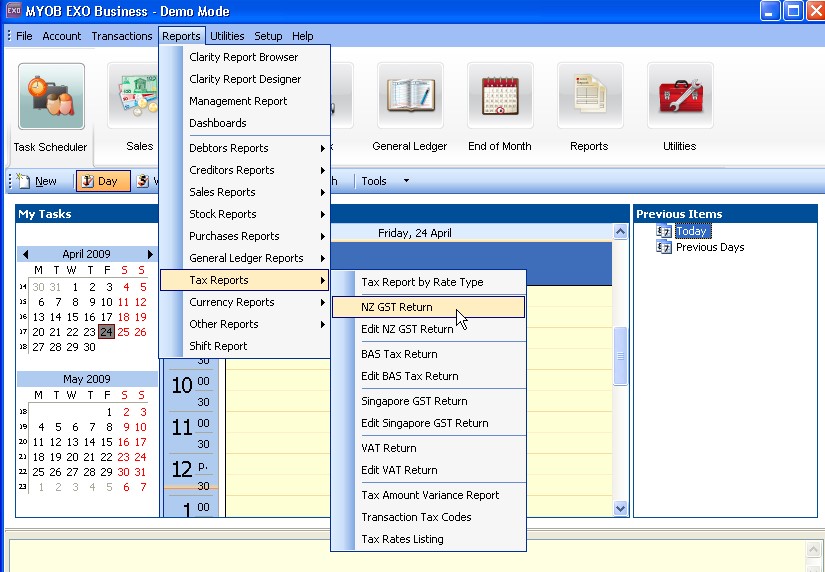
Click on Reports at the top of the MYOB EXO Business menu and scroll down to Tax Reports—> NZ GST Return
It will then open the screen below
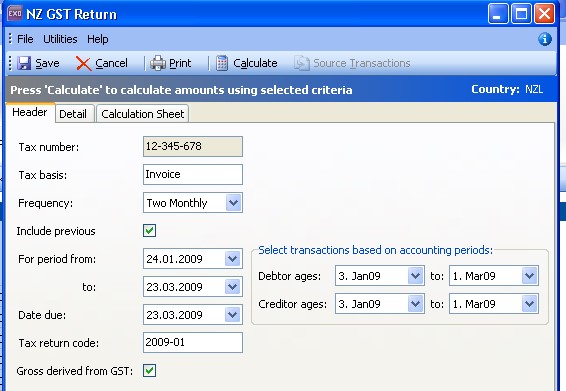
The tax number, tax basis, and frequency will already be set up.
The ‘include previous’ tick box will need to be ticked on as this will make sure any transactions entered after the last Tax Return will be included in the current one.
The ‘for period fields’ should be selected for the period you are doing the tax return for. The accounting periods should also be the same as the dates. (Depending on your setup you may not have these fields.)
The ‘Date Due’ is the date that the Tax Return is due to the IRD.
Tax Return code should be the year you are doing the return for followed by the month the return is for. (This will make it easier to reference back to it in future)
‘Gross Derived from GST’ should also be ticked on.
The next step is to click “Calculate” at the top of the screen. It may take a few minutes as it will be retrieving transactions from the database.
Then the following screen will appear.
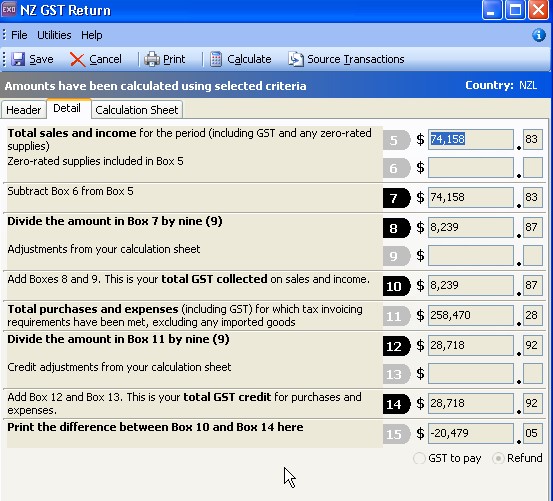
This is showing you all income and expense amounts, and gives you the total GST to pay, or refund amount.
GST ADJUSTMENT
For any manual adjustments you need to do you click on the “Calculation Sheet” tab.
You will notice that you cannot enter anything into any of the boxes.
To change this you have to go to ‘utilities’ as shown below and select “enable edit”.
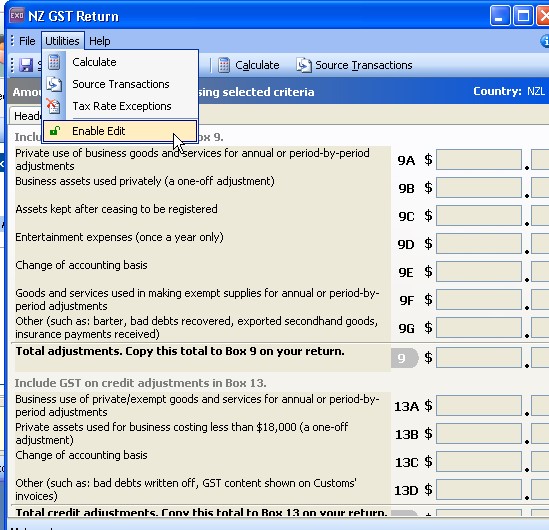
You will now see that the fields are no longer blanked out and you can type in to them.
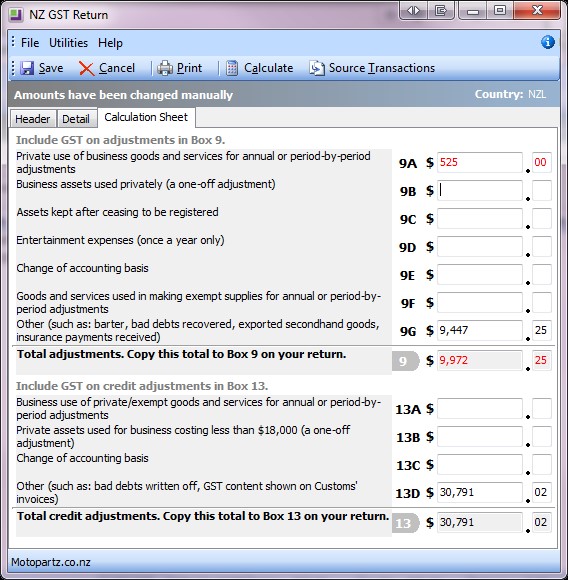
Once you have added your adjustments to the Calculations screen you then need to make sure your General Ledger balances to match your GST Payments. (Please see below for an example).
You can choose to print the report of by pressing the “Print” button. It will ask if you want to print the calculation sheet as well so click yes and the below will appear.
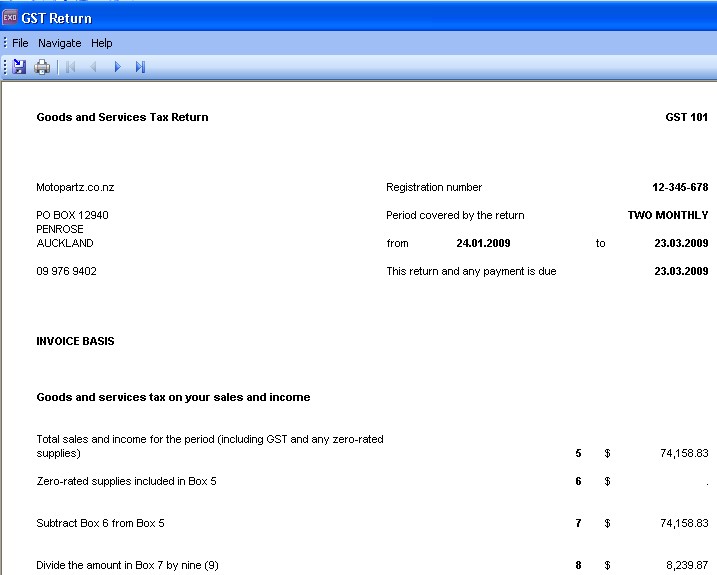
From here you can now print or export (to Excel) the “source transactions”. You do not have to print this report as you can reprint it again at any time in the future.
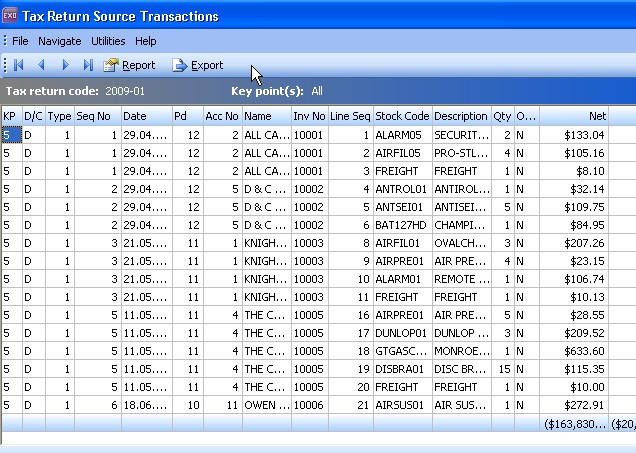
Once you have done this click the “X” in the top right corner then click “Save” on the “Tax Return Source Transactions screen”.
Please be aware that once you save it will take you back to the main menu screen.
NOTE: It is important that you save the Tax Return after printing it, so that the system knows for next time what transactions have already been included in a GST return.
ENTERING A GL JOURNAL FOR MANUAL GST ADJUSTMENTS
In our example in the above image we have added $525.00 to the Private use of Business goods section so we now need to enter this into your GL. You do this by entering a GL Journal.
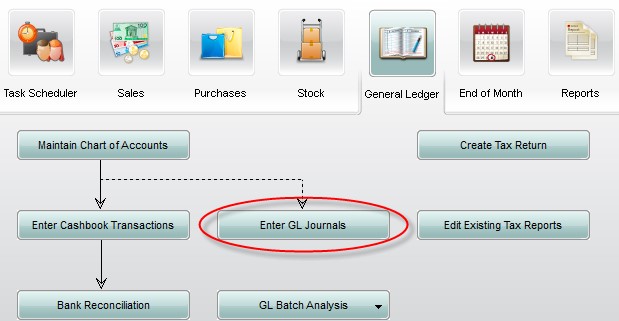
Once you have the Journal Screen is open, click on “New” and then you enter the details.
Please note that any adjustments that increase the GST you pay, you credit the GST control account, in this example it is called GST CONTROL ACCOUNT. You will need to consult with your accountant as to the correct General Ledger Account to use.
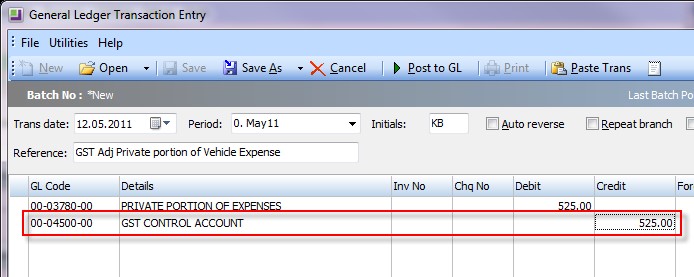
If you have adjustments that decrease the GST you pay then you debit the GST control account.
Since General Ledgers need to balance you will need to debit the amount from the appropriate GL Account, as per advised by your Accountant within the same journal that the credit is issued. Our example is called PRIVATE PORTION OF EXPENSES.
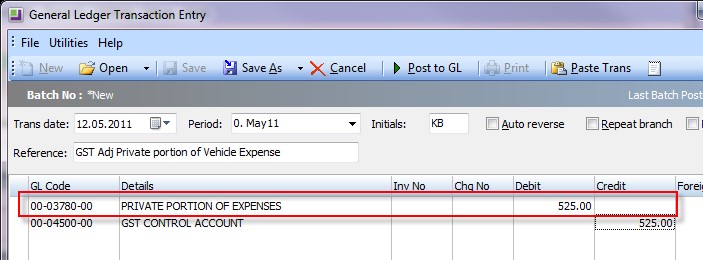
Please check that the Trans Date and Period from the GL Journal match the GST Return Adjustment dates.

