MYOB EXO – Setting Up a New EXO Shortcut on a Desktop

Do you have a PC or Laptop that you wish to set up a shortcut for MYOB EXO on?

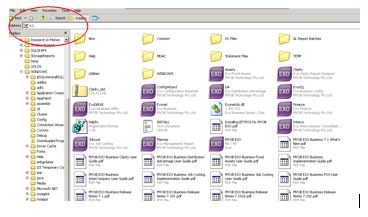
  • From the workstation access the EXO Drive (this is usually your X: Drive)
  • Right click on the ExonetLib.dll file and select ‘Copy
  • Paste into location C:/Windows/System32 (If you receive a message asking if you wish to paste over top of current file, click yes)
  • From the Start Menu menu, select ‘Run’ and type ‘Regsvr32 exonetlib.dll’ and click enter, you will receive a message saying this has ‘run successfully’ (n.b. this will only need to be run once on initial set up)
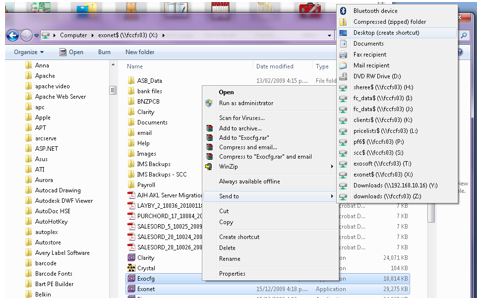
  • Highlight the required executables from the EXO Drive, right click and select ‘Send to Desktop (create shortcut)’.
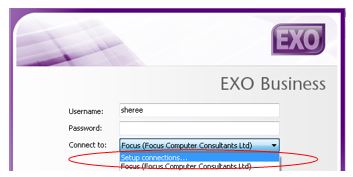
  • Open EXO Business Shortcut from the Desktop and from the drop down menu, select ‘Setup connections’…
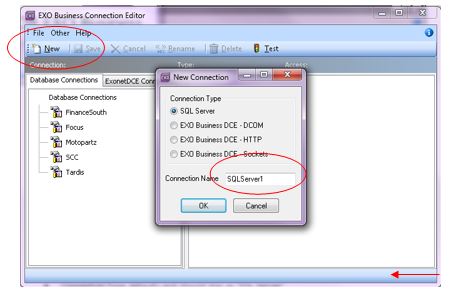
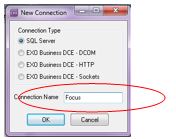
  • Select ‘New
  • Connection Type defaults to ‘SQL Server’ click ‘OK
  • Change the Connection Name to relevant EXO Database name e.g. ‘Focus
  • Select ‘OK

In EXO Business Connection Editor enter the connection details, these settings need to be the same as for existing EXO connection details on other PC’s on your Network and in the same format. Ask your Network Administrator if you need assistance with this.
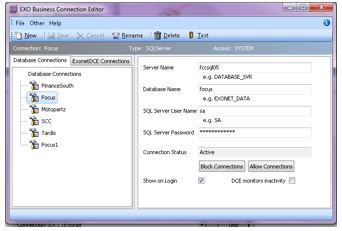
  • Select ‘Save
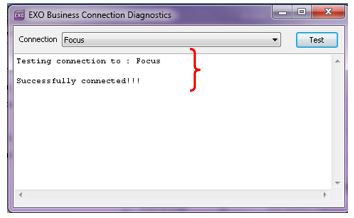
  • Select ‘Test
  • Select ‘Test’ again from EXO Business Connection Diagnostics

You should receive the above “Successfully connected!!!’ message

If you should you experience any problems or require any further assistance please call your friendly Software Support Team on 0800 12 00 99

Leave a Reply